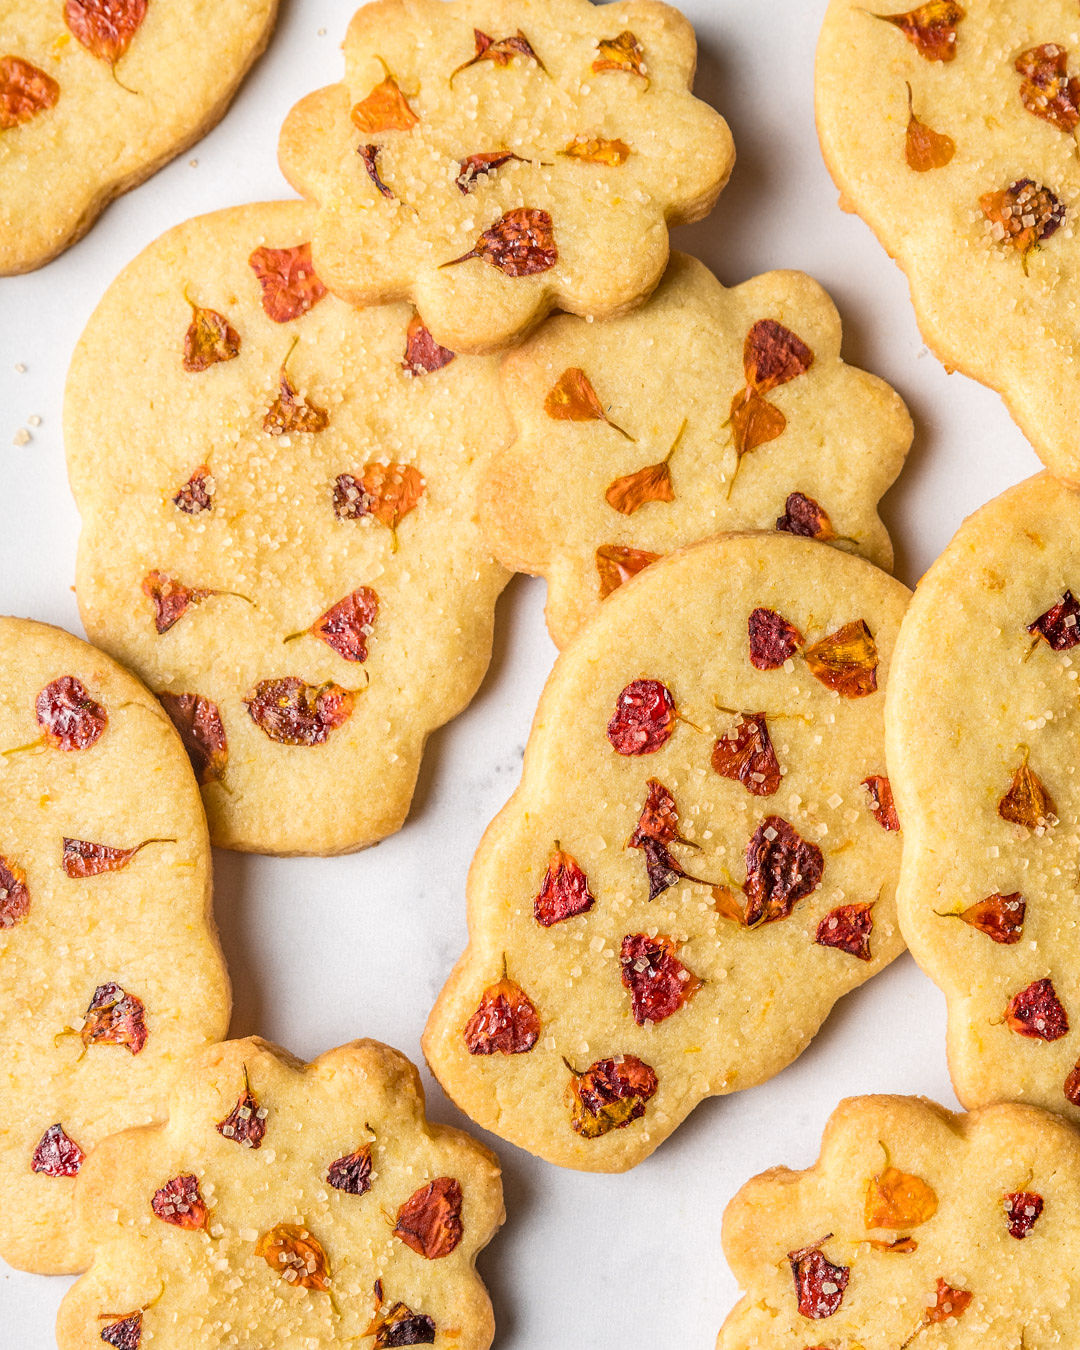
How to Make Sugar Skull Cookies with Edible Marigolds


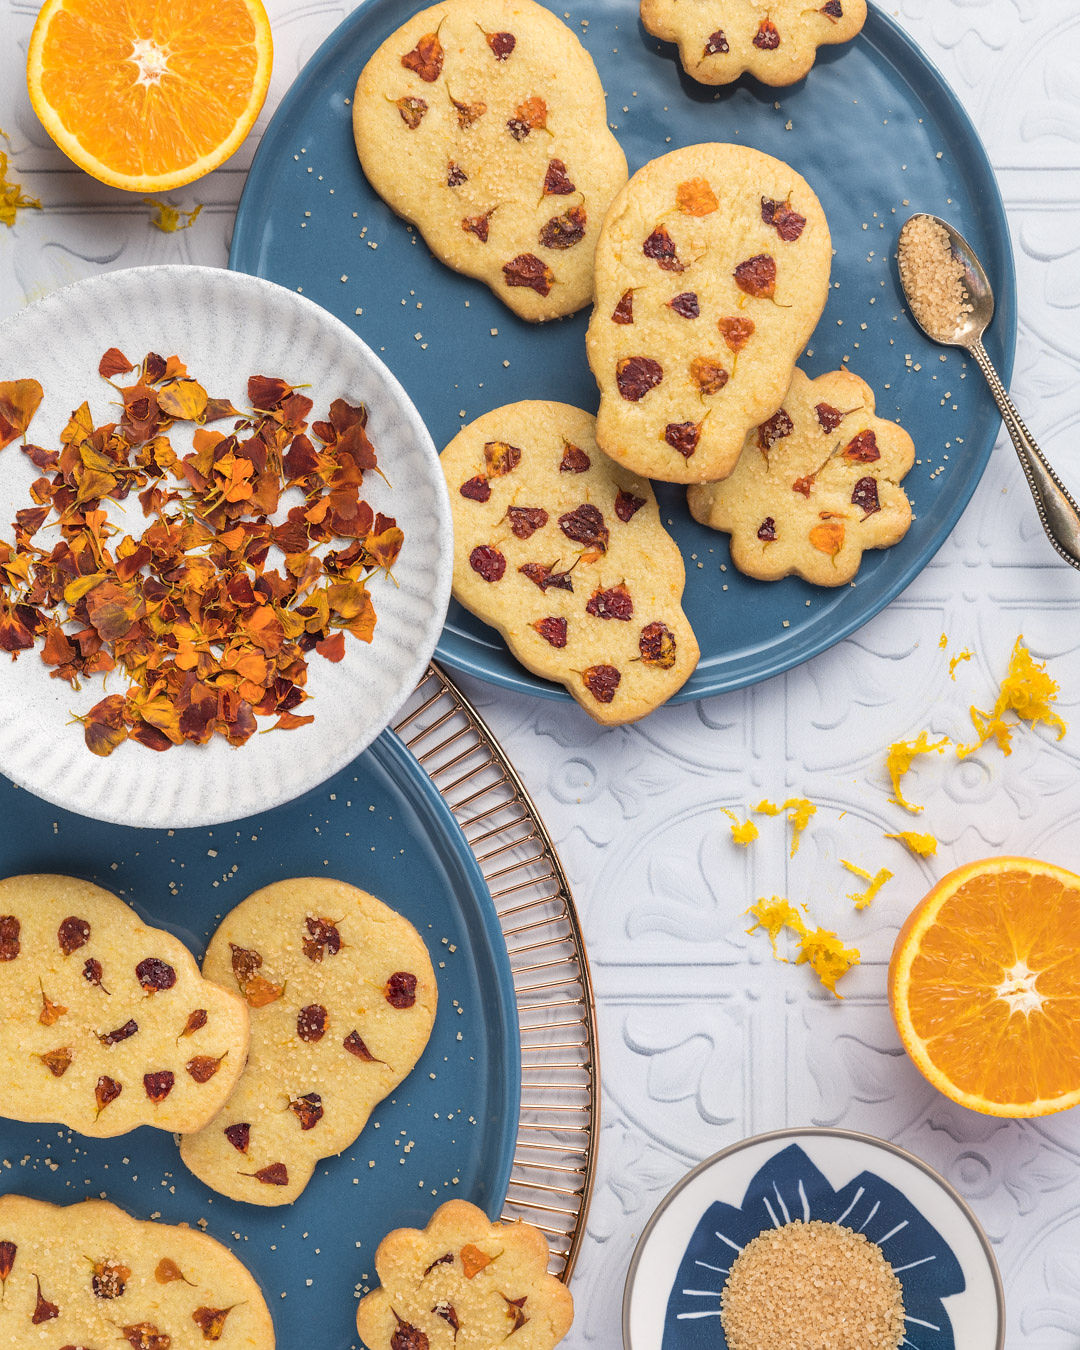
These lovely marigold sugar skull cookies are made with flavors reminiscent of pan de muerto. They’re the perfect addition to any Día de Muertos menu.
While I have never been much of a baker, I’ve definitely channeled my inner panadera over the past few years. And now I’m excited to experiment with new flavors that remind me of the bread we eat on Day of the Dead.
Pan de muerto is a semi-sweet bread that’s baked in the shape of bones. Look for it at Mexican grocery stores and bakeries in the weeks leading up to up to Day of the Dead. It’s a common offering on altars used to entice visits from deceased loved ones during this time. Depending on the region where you taste it, people will infuse it with different flavors, like anise or orange blossom.
INGREDIENTS YOU’LL NEED
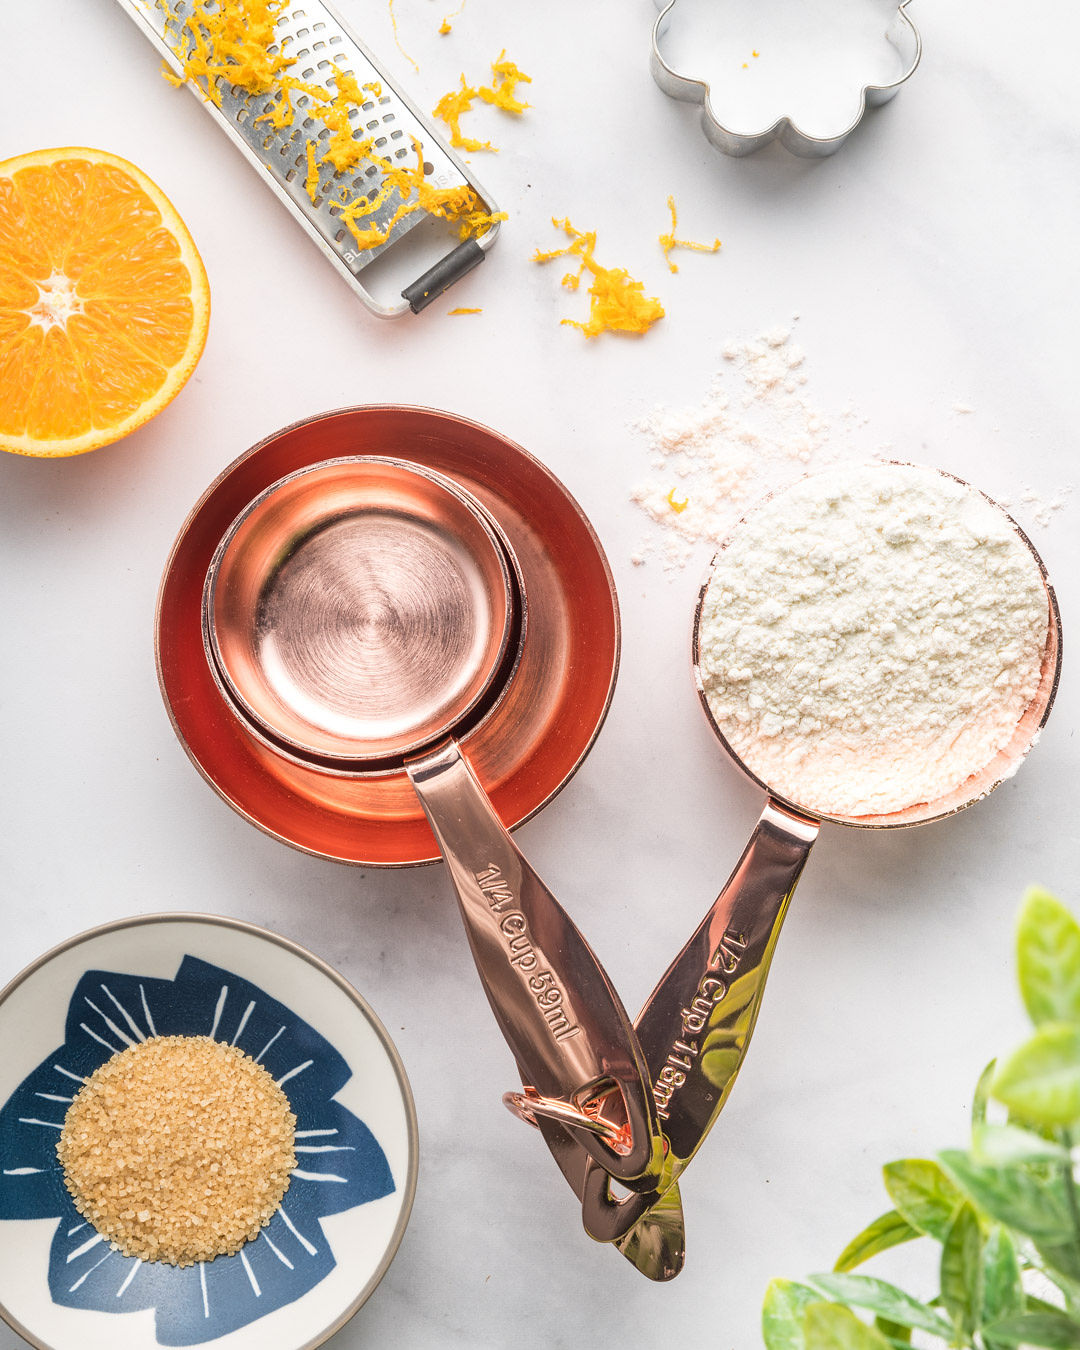
The ingredients you’ll need to make these marigold cookies are quite simple, with the exception of the orange blossom water. I use sugar, butter, salt, eggs, vanilla extract, flour, oranges (and zest), and orange blossom water. The marigold petals and turbinado sugar add the final touches!
STEP-BY-STEP INSTRUCTIONS
PREPARE THE DOUGH
- If using a stand mixer, fit it with the paddle attachment. If using a hand mixer, use the beater attachments. In a large bowl, beat the butter, sugar, and salt on medium speed until light and fluffy and well combined.
- Reduce the speed to low, then add the eggs and egg yolks, one at a time, mixing until just incorporated after each addition.
- Add the vanilla extract, orange blossom water, and orange zest. Mix briefly—just until combined, about 15 to 30 seconds.
- If you’re using a hand mixer, you can complete the next step by hand to avoid over-mixing. Otherwise, continue using the stand mixer with the paddle attachment.
- Gradually add the flour in batches (about 4 cups total), mixing on low speed just until incorporated—do not over-mix.
- Transfer the dough to a lightly floured work surface. Knead it briefly by hand to incorporate all of the flour.
- Divide the dough into two equal portions and shape each into a ball. Flatten each slightly with your hands to form discs.
- Wrap or cover tightly in an airtight container or plastic wrap. Refrigerate until completely firm—at least 45 minutes, or overnight if possible for best results.
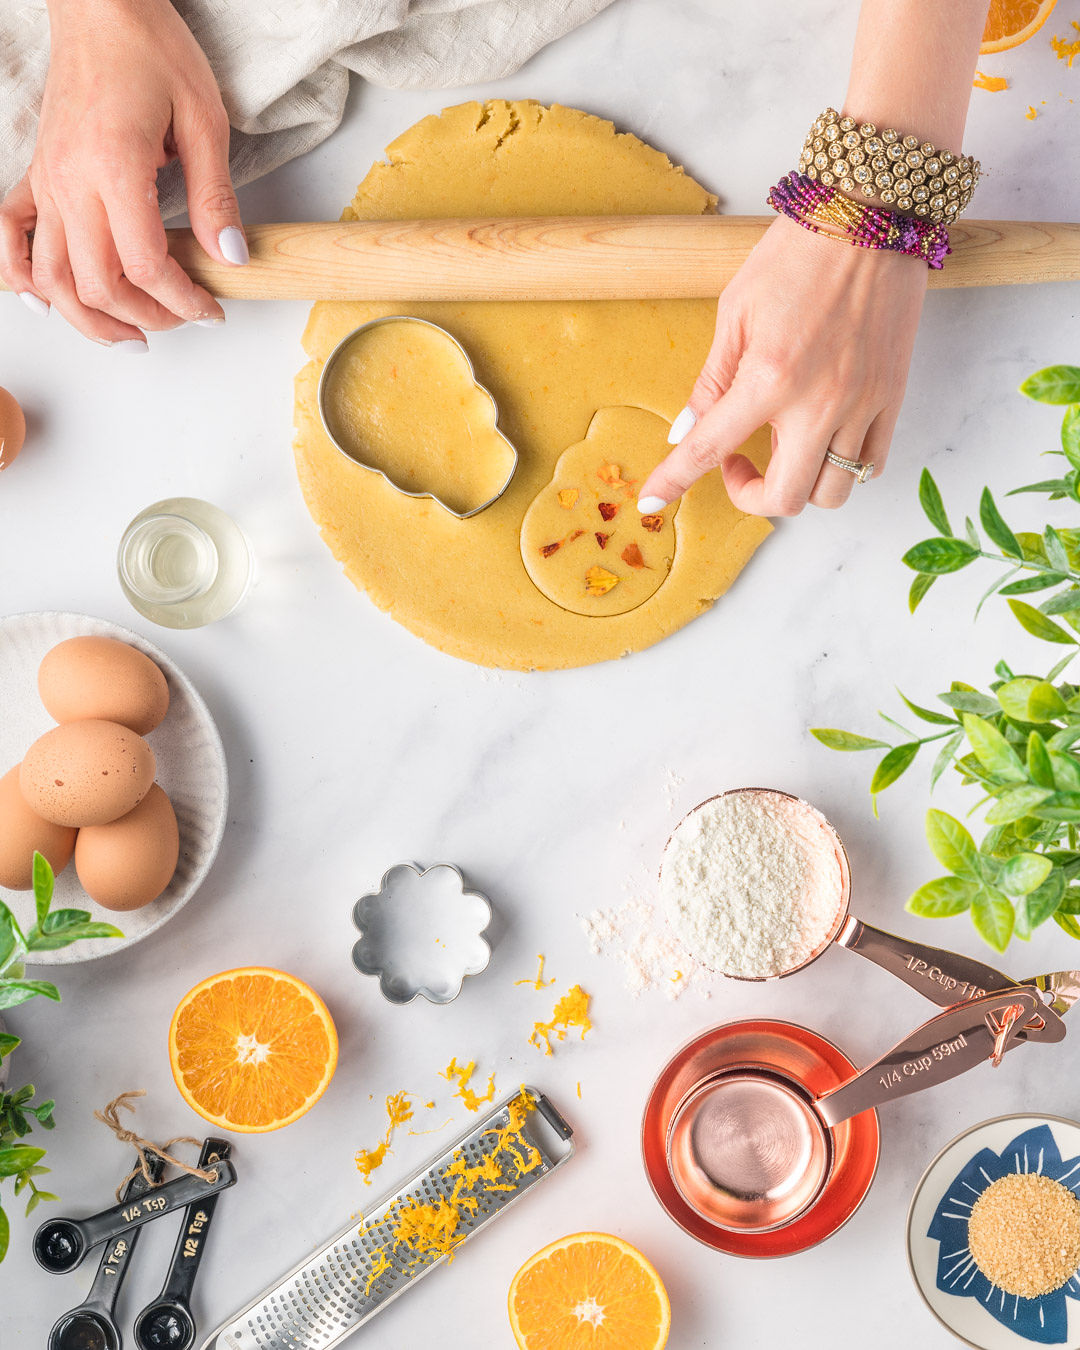
CUT
- Once the dough is chilled and firm, remove one disc from the refrigerator and let it sit at room temperature for a few minutes if it’s too hard to roll.
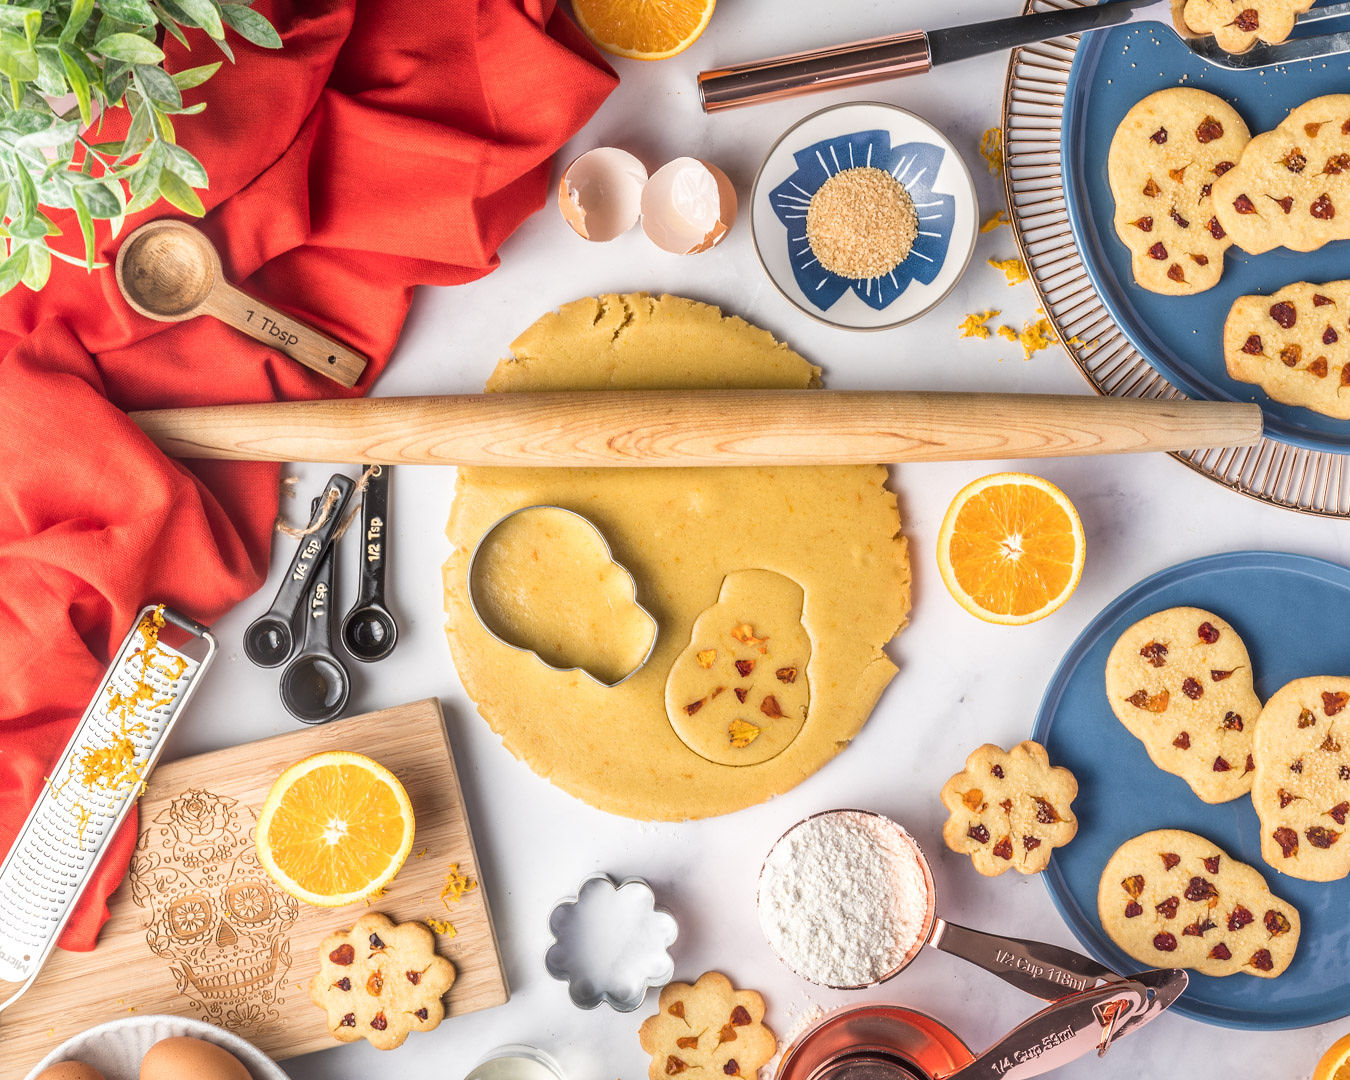
- On a lightly floured surface, roll out the dough to about ¼-inch thickness.
- Using your chosen cookie cutter, cut out as many cookies as possible, placing the cuts close together to minimize waste.
- Gather and re-roll any scraps of dough, and continue cutting until all the dough is used up.
- Repeat the process with the second disc of dough.
BAKE
- Place the cookies onto a parchment- or silicone-lined baking sheet. Gently press a few edible flower petals onto each cookie.
- If the petals don’t stick, lightly brush the surface with a bit of water using a small food-safe paintbrush or your fingertip before placing the petals.
- Transfer the baking sheet to the freezer and chill the cookies for at least 45 minutes. This helps the cookies hold their shape during baking.
- At this stage, you can also store the cookies in an airtight container (with wax or parchment paper between layers) and freeze them until ready to bake.
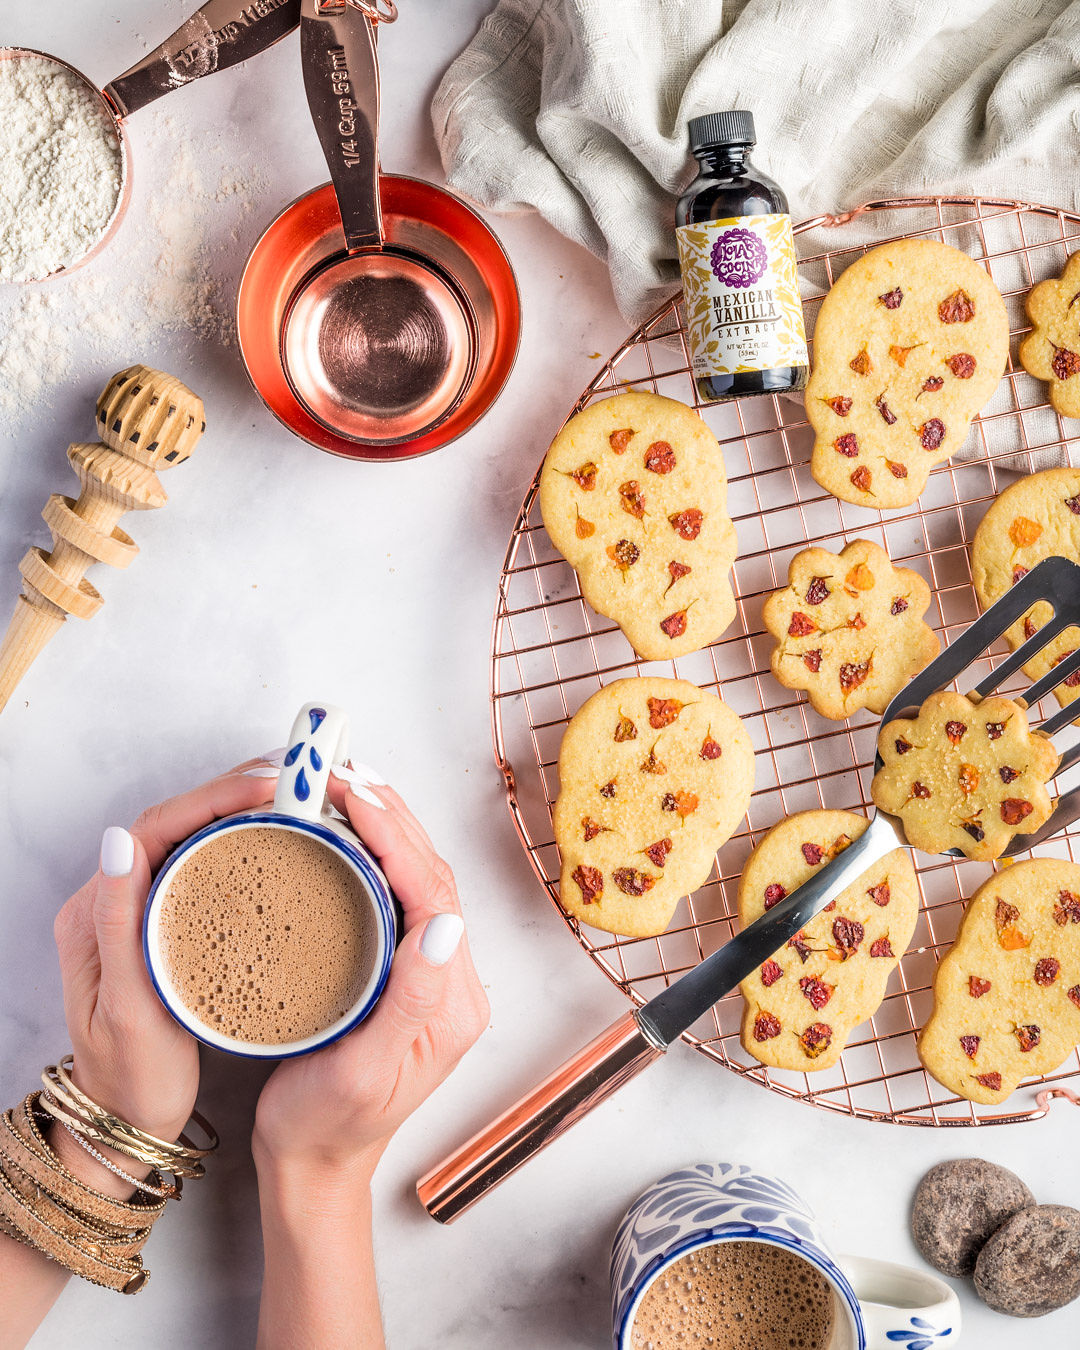
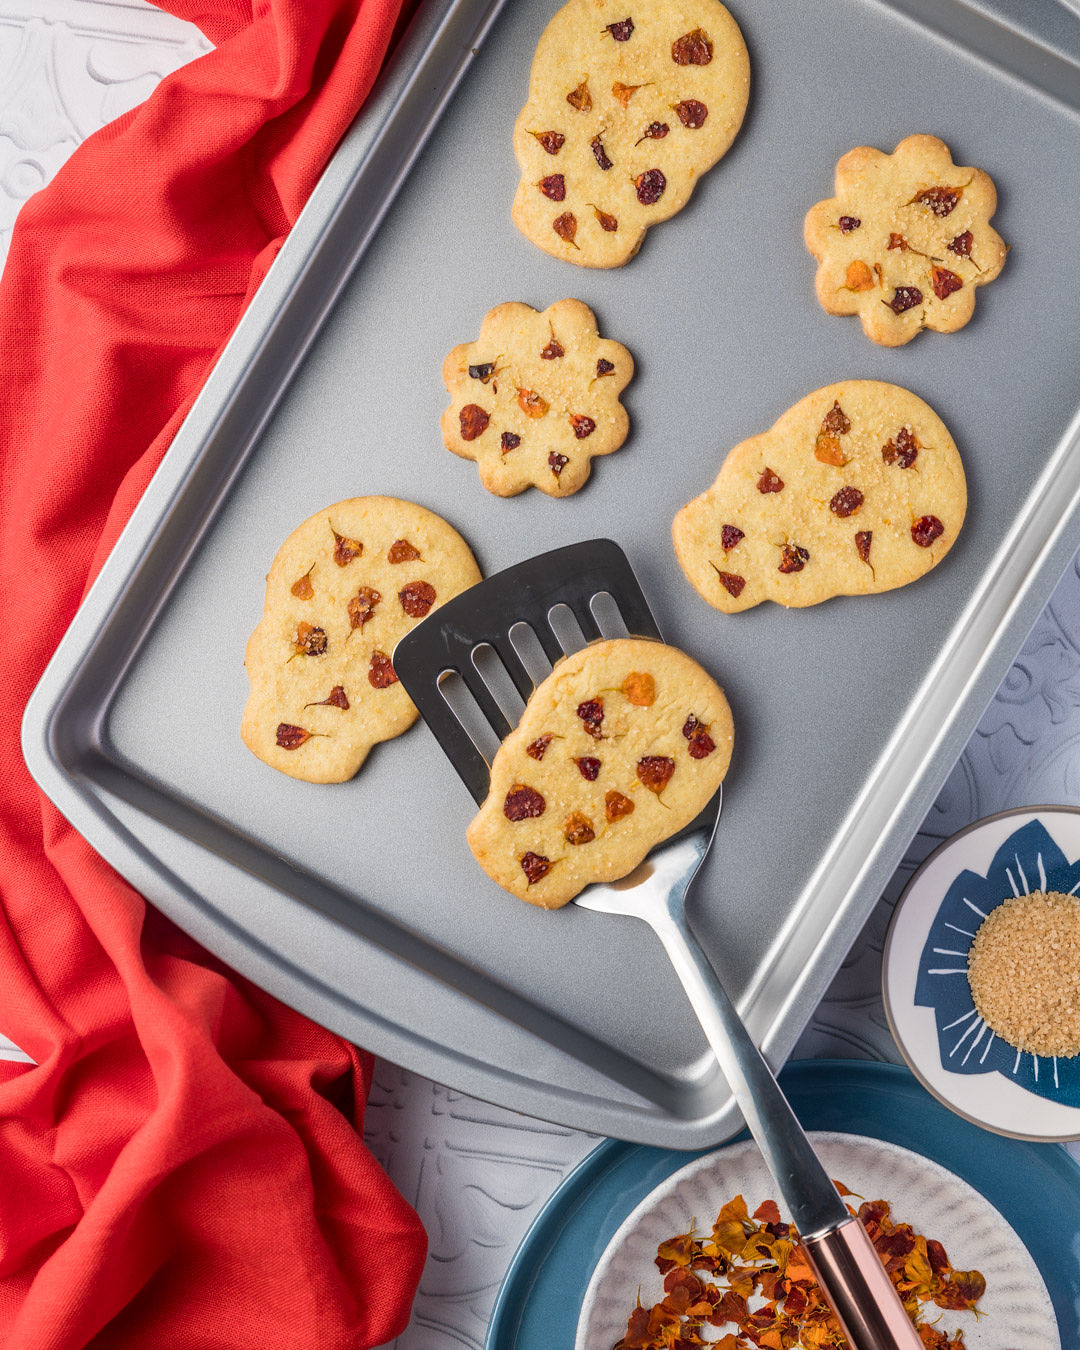
- When ready to bake, preheat the oven to 350°F (175°C). Lightly sprinkle each cookie with turbinado sugar.
- Bake for 8 to 15 minutes, or until the edges are just beginning to turn a light golden color. Baking time will vary depending on your oven and cookie size.
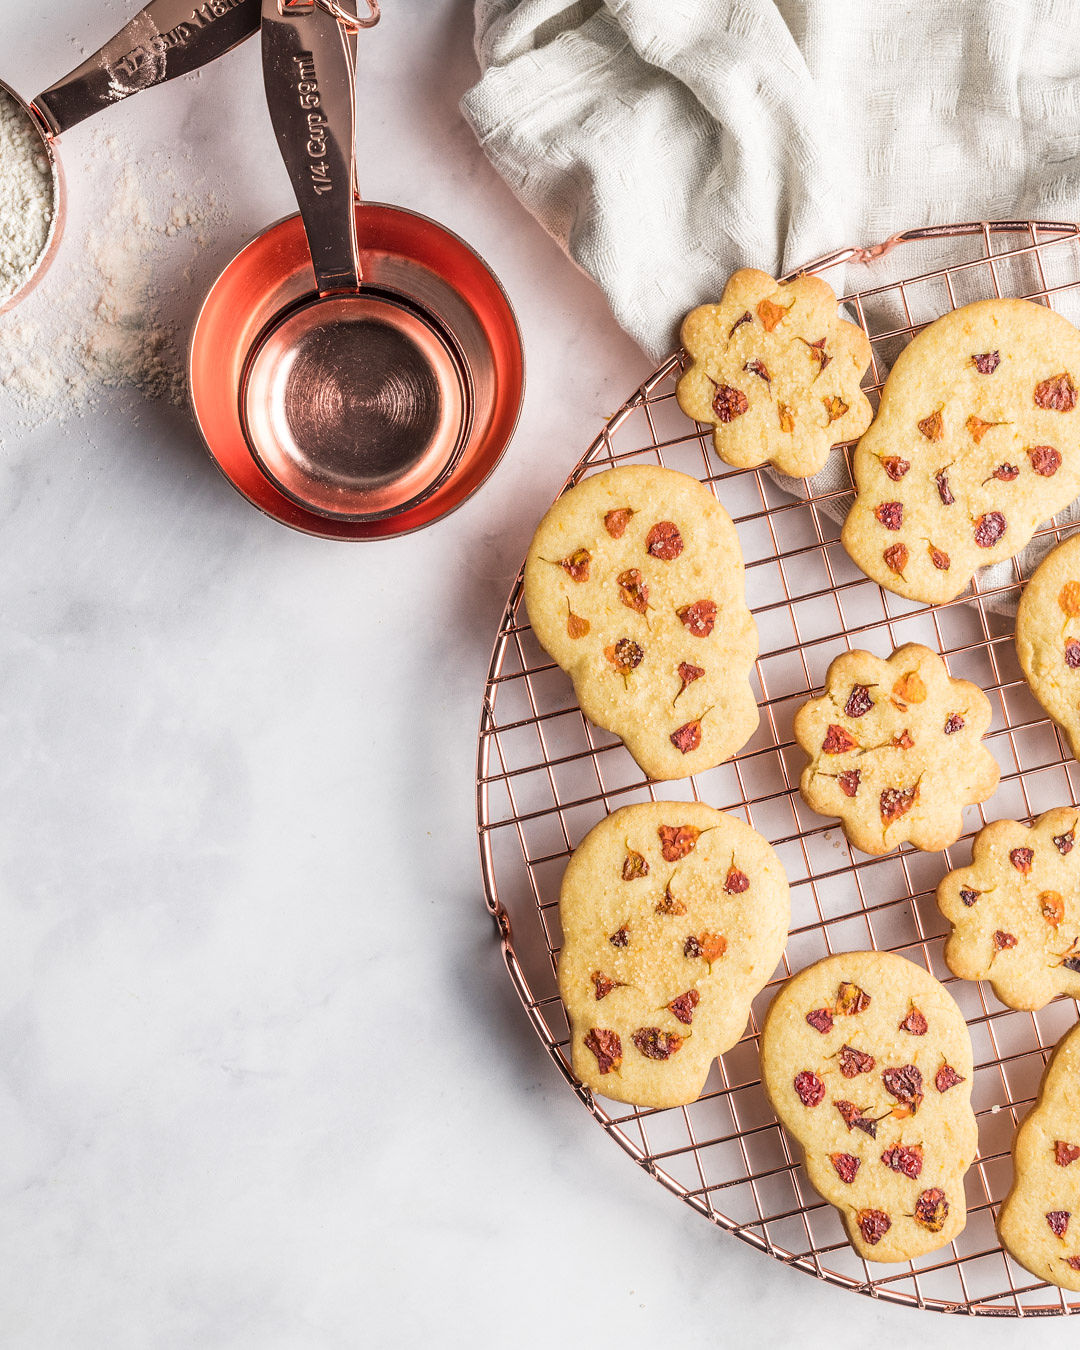
- Let cool slightly, then enjoy warm—or wrap and gift them to loved ones as a beautiful, edible tribute!
On Day of the Dead, people believe that marigolds help guide our loved ones back to the world of the living with their bright color and fragrance. The Aztecs believed that the smell of marigolds could wake the souls of the dead and bring them back for the festival that celebrated the goddess of the underworld and death, Mictecacihuatl.
If you make and try this recipe, be sure to check out my Lavender Sugar Cookies! They’re perfect to say, te amo, any time of year.
LOOKING FOR MORE INSPIRATION?
- 100+ Best Day of the Dead Food and Drink Recipes
- Celebrate Life with Authentic Dia de Muertos Food!
- BEST Bilingual Day of the Dead Books for Kids
- Symbolic Flowers for Dia de Muertos: Marigolds and More
- BEST Day of the Dead Crafts for Kids and Adults
- Unique Day of the Dead Decorations for Your Home Altar
- How to Make Calabazas Dulces (Mexican Candied Pumpkin)
- Sugar Skulls and Spirits: Decoding the Symbolism of Altar Items
- Ultimate Guide: Papel Picado History and Day of the Dead
- How to Make Camote Enmielado (Mexican Candied Sweet Potatoes)
- Day of the Dead: A Celebration of Life!
- How to Make an Árbol de la Vida for Day of the Dead
- Day of the Dead: Passing on Cultural Traditions from One Generation to the Next
- 3 Foods Associated with Day of the Dead
Sugar Skull Cookies with Edible Marigolds
Equipment
Ingredients
- 1 ½ cups granulated sugar
- 2 sticks unsalted butter room temperature
- 1 teaspoon salt
- 2 eggs
- 2 egg yolks
- 2 teaspoons Mexican vanilla extract
- 2 teaspoons orange blossom water also referred to as orange flower water
- 2 oranges zest only
- 4 cups all-purpose flour sifted + more for counter
- Marigold petals pressed
- Turbinado sugar for dusting optional
Instructions
- If using a stand mixer, fit it with the paddle attachment. If using a hand mixer, use the beater attachments. In a large bowl, beat the butter, sugar, and salt on medium speed until light and fluffy and well combined. Reduce the speed to low, then add the eggs and egg yolks, one at a time, mixing until just incorporated after each addition. Add the vanilla extract, orange blossom water, and orange zest and mix briefly—just until combined, about 15 to 30 seconds. If you're using a hand mixer, you can complete the next step by hand to avoid over-mixing. Otherwise, continue using the stand mixer with the paddle attachment. Gradually add the flour in batches (about 4 cups total), mixing on low speed just until incorporated—do not over-mix. Transfer the dough to a lightly floured work surface and knead it briefly by hand to ensure all the flour is fully incorporated. Divide the dough into two equal portions and shape each into a ball. Flatten each slightly with your hands to form discs. Wrap or cover tightly in an airtight container or plastic wrap and refrigerate until completely firm—at least 45 minutes, or overnight if possible for best results.
- Once the dough is chilled and firm, remove one disc from the refrigerator and let it sit at room temperature for a few minutes if it's too hard to roll. On a lightly floured surface, roll out the dough to about ¼-inch thickness. Using your chosen cookie cutter, cut out as many cookies as possible, placing the cuts close together to minimize waste. Gather and re-roll any scraps of dough, and continue cutting until all the dough is used up. Repeat the process with the second disc of dough.
- Place the cookies onto a parchment- or silicone-lined baking sheet. Gently press a few edible flower petals onto each cookie. If the petals don’t stick, lightly brush the surface with a bit of water using a small food-safe paintbrush or your fingertip before placing the petals. Transfer the baking sheet to the freezer and chill the cookies for at least 45 minutes. This helps the cookies hold their shape during baking. At this stage, you can also store the cookies in an airtight container (with wax or parchment paper between layers) and freeze them until ready to bake. When ready to bake, preheat the oven to 350°F (175°C). Lightly sprinkle each cookie with turbinado sugar. Bake for 8 to 15 minutes, or until the edges are just beginning to turn a light golden color. Baking time will vary depending on your oven and cookie size. Let cool slightly, then enjoy warm—or wrap and gift them to loved ones as a beautiful, edible tribute!
A Note from Lola
A NOTE ON PRESSED FLOWERS
If you’ve never pressed edible flowers before, you can remove the petals from about five marigolds and lay them spaced out on a sheet of paper, then place another sheet of paper on top and enclose the two sheets between the pages of a large, heavy book. Since the petals are small, the entire drying process should take about 2-3 days. Your other option is to dry them quickly in the microwave using this method.This recipe was originally published on October 22, 2020 and updated with step-by-step instructions and images on October 9, 2025.
Lola’s Cocina is a small business that earns various revenue streams. This includes sponsored posts and affiliate commissions from linked products, which I use and love, with no extra cost to readers. This income helps sustain the site.
Many thanks to Crate and Barrel for sponsoring this post. As always, the recipe and opinions shared are my own.
Photography + Styling: Cacey McReavy

Lola Wiarco Dweck
Lola is a Mexican-American recipe developer, writer, and cooking instructor who loves sharing her culture with the world. Growing up in California and spending summers in Mexico, Lola celebrates her family’s Mexican recipes and vibrant culture through Lola’s Cocina.


One Comment